Git
Git is a version control system that lets you track who made changes to what when and has options for easily updating a shared or public version of your code on github.com. You will need a supported web browser.
You will need an account at github.com for parts of the Git lesson. Basic GitHub accounts are free. We encourage you to create a GitHub account if you don't have one already. Please consider what personal information you'd like to reveal. For example, you may want to review these instructions for keeping your email address private provided at GitHub.
Git should be installed on your computer as part of your Bash install (see the Shell installation instructions).
Please open the Terminal app, type git --version and press
Enter/Return. If it's not installed already,
follow the instructions to Install the "command line
developer tools". Do not click "Get Xcode", because that will
take too long and is not necessary for our Git lesson.
After installing these tools, there won't be anything in your /Applications
folder, as they and Git are command line programs.
For older versions of OS X (10.5-10.8) use the
most recent available installer labelled "snow-leopard"
available here.
(Note: this project is no longer maintained.)
Because this installer is not signed by the developer, you may have to
right click (control click) on the .pkg file, click Open, and click
Open in the pop-up dialog.
If Git is not already available on your machine you can try to
install it via your distro's package manager. For Debian/Ubuntu run
sudo apt-get install git and for Fedora run
sudo dnf install git.
OpenRefine
For this lesson you will need OpenRefine and a web browser. Note: this is a Java program that runs on your machine (not in the cloud). It runs inside a web browser, but no web connection is needed.
- Check that you have either the Firefox or the Chrome browser installed and set as your default browser. OpenRefine runs in your default browser. It will not run correctly in Internet Explorer.
- Download software from http://openrefine.org/
- Create a new directory called OpenRefine.
- Unzip the downloaded file into the OpenRefine directory by right-clicking and selecting "Extract ...".
- Go to your newly created OpenRefine directory.
- Launch OpenRefine by clicking
openrefine.exe(this will launch a command prompt window, but you can ignore that - just wait for OpenRefine to open in the browser). - If you are using a different browser, or if OpenRefine does not automatically open for you, point your browser at http://127.0.0.1:3333/ or http://localhost:3333 to use the program.
- Check that you have either the Firefox or the Chrome browser installed and set as your default browser. OpenRefine runs in your default browser. It may not run correctly in Safari.
- Download software from http://openrefine.org/.
- Create a new directory called OpenRefine.
- Unzip the downloaded file into the OpenRefine directory by double-clicking it.
- Go to your newly created OpenRefine directory.
- Launch OpenRefine by dragging the icon into the Applications folder.
- Use Ctrl-click/Open ... to launch it.
- If you are using a different browser, or if OpenRefine does not automatically open for you, point your browser at http://127.0.0.1:3333/ or http://localhost:3333 to use the program.
- Check that you have either the Firefox or the Chrome browser installed and set as your default browser. OpenRefine runs in your default browser.
- Download software from http://openrefine.org/.
- Make a directory called OpenRefine.
- Unzip the downloaded file into the OpenRefine directory.
- Go to your newly created OpenRefine directory.
- Launch OpenRefine by entering
./refineinto the terminal within the OpenRefine directory. - If you are using a different browser, or if OpenRefine does not automatically open for you, point your browser at http://127.0.0.1:3333/ or http://localhost:3333 to use the program.
Python
Python is a popular language for research computing, and great for general-purpose programming as well. Installing all of its research packages individually can be a bit difficult, so we recommend Conda-forge, an all-in-one installer.
Regardless of how you choose to install it, please install the most recent Python version available by going to the latest download site and scrolling to the Files section to find the download for your operating system.
We will teach Python using the Jupyter Notebook, a programming environment that runs in a web browser (Jupyter Notebook will be installed by Miniforge). For this to work you will need a reasonably up-to-date browser. The current versions of the Chrome, Safari and Firefox browsers are all supported (some older browsers, including Internet Explorer version 9 and below, are not).
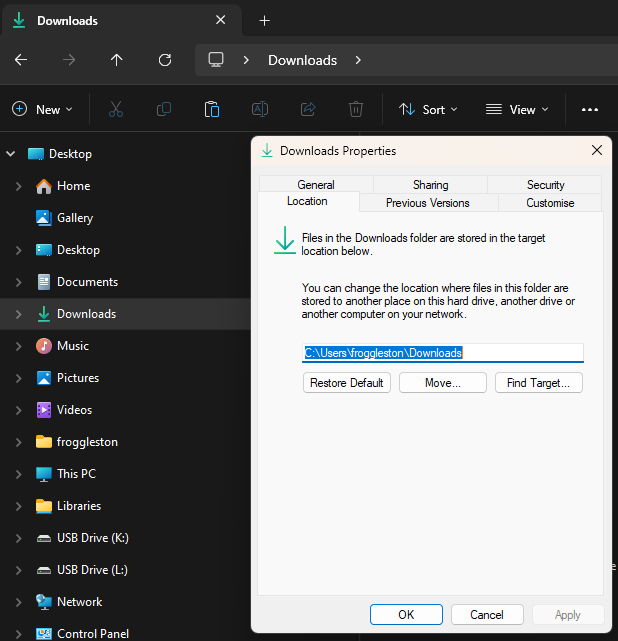
Before you start: Issues relating to OneDrive
C:\Users\[your-username]\) within an organisation.
It may cause issues with the installation of the Carpentries environment.If you have OneDrive set up, please ensure that you can access your
C:\Users\[your-username]\Downloads folder:
- Open File Explorer
- Right click on the "Downloads" folder in the left-hand navigation pane
- Select "Properties"
- In the "Location" tab, ensure that the path is set to
C:\Users\[your-username]\Downloads
- Open https://conda-forge.org/download/ with your web browser.
- Download the Miniforge for Windows installer
- Double click on the downloaded file (Something like,
Minforge3-Windows-x86_64.exe) - If you get a "Windows protected your PC" pop-up from Microsoft Defender SmartScreen, click on "More info" and select "Run anyway"
- Follow through the installer using all of the defaults for installation except make sure to check Add Miniforge3 to my PATH environment variable.
- Then:
- EITHER:
- Right click the following link and click "Save link as...": Carpentries environment file
- Save the file to your
C:\Users\[your-username]\Downloadsfolder. -
Make sure that the filename is
carpentries_environment.ymland the "Save as type" option is set toYML file (*.yml)
The following steps requires using the Miniforge Prompt command line. If you aren't comfortable doing the installation yourself stop here and request help at the workshop.
- OR:
- Open Git Bash
cd ~/Downloadscurl -L -O https://raw.githubusercontent.com/carpentries/workshop-template/refs/heads/gh-pages/data/carpentries_environment.yml
- EITHER:
- Open your Start Menu from your taskbar, or use the Win Windows key.
- Search for the application "Miniforge Prompt", and click the icon to open it.
- Once open, ensure the prompt shows your
C:\Users\[your-username]folder. If it does, continue to Step 8 below:
![Miniforge Prompt [your-username] as froggleston](assets/img/miniforge_prompt.png)
In this case, the prompt showsC:\Users\froggleston. Your username will be different! - If it doesn't:
- Find your username by typing
whoamiand press Enter - Your username will be shown as
[machine-name]\[your-username]. You only need the[your-username]part after the slash, i.e.frogglestonin this example. - Type
cd C:\Users\[your-username]and press Enter

- Continue to Step 8 below
- Find your username by typing
- If you get stuck, please contact your workshop organisers to get assistance before the workshop starts.
- Once open, ensure the prompt shows your
- In the Miniforge Prompt window, run the following commands:
- Type
cd Downloadsand press Enter - Type
conda env create -f carpentries_environment.ymland press Enter
- Type
- The installation may take a few minutes depending on your internet connection speed. Once complete, you can close the Miniforge Prompt window.
- Open https://conda-forge.org/download/ with your web browser.
- Download the appropriate Miniforge installer for macOS
The following steps require using the shell. If you aren't comfortable doing the installation yourself stop here and request help at the workshop. -
Open a terminal window and navigate to the directory where the executable is downloaded (e.g.,
cd ~/Downloads). -
Type
bash Miniforge3-
and then press Tab to autocomplete the full file name. The name of file you just downloaded should appear. Press Enter (or Return depending on your keyboard). -
Follow the text-only prompts in the terminal. To move through the text, press Spacebar.
- Type
yesand press Enter (or Return) to approve the license. - Press Enter (or Return) to approve the default location for the files.
- Type
yesand press Enter (or Return) to prepend Miniforge to yourPATH(this makes the Miniforge distribution the default Python).
- Type
- Then:
- EITHER:
- Right click the following link and click "Save link as...": Carpentries environment file
- Save the file to your
Downloadsfolder. - Make sure that the filename is
carpentries_environment.ymland the "Save as type" is set toYML file (*.yml)
- OR :
- Open your `bash` terminal
cd ~/Downloadscurl -L -O https://raw.githubusercontent.com/carpentries/workshop-template/refs/heads/gh-pages/data/carpentries_environment.yml
- EITHER:
- In the terminal, run:
conda env create -f ~/Downloads/carpentries_environment.yml - Close the terminal window.
- Open https://conda-forge.org/download/ with your web browser.
- Download the appropriate Miniforge installer for Linux
The following steps require using the shell. If you aren't comfortable doing the installation yourself stop here and request help at the workshop. -
Open a terminal window and navigate to the directory where the executable is downloaded (e.g.,
cd ~/Downloads). -
Type
bash Miniforge3-
and then press Tab to autocomplete the full file name. The name of file you just downloaded should appear. Press Enter (or Return depending on your keyboard). -
Follow the text-only prompts in the terminal.
To move through the text, press Spacebar.
- Type
yesand press Enter (or Return) to approve the license. - Press Enter (or Return) to approve the default location for the files.
- Type
yesand press Enter (or Return) to prepend Miniforge to yourPATH(this makes the Miniforge distribution the default Python).
- Type
- Then:
- EITHER:
- Right click the following link and click "Save link as...": Carpentries environment file
- Save the file to your
Downloadsfolder. - Make sure that the filename is
carpentries_environment.ymland the "Save as type" is set toYML file (*.yml)
- OR :
- Open your terminal
cd ~/Downloadscurl -L -O https://raw.githubusercontent.com/carpentries/workshop-template/refs/heads/gh-pages/data/carpentries_environment.yml
- EITHER:
- In the terminal, run:
conda env create -f ~/Downloads/carpentries_environment.yml - Close the terminal window.
R
R is a programming language that is especially powerful for data exploration, visualization, and statistical analysis. To interact with R in our lessons, we typically use RStudio.
Install R by:
- Downloading and running this .exe file from CRAN.
- Installing the RStudio IDE.
Install R by:
- Downloading and running this .pkg file from CRAN.
- Installing the RStudio IDE.
Install R by:
- Navigating to CRAN and following the instructions outlined there, using your package manager. We have reproduced the commands below:
Use the terminal command prompt to type/copy-and-paste these commands in, pressing Enter after each line to run the command.
Do not run the lines with#at the start of each line, as this indicates a comment and is not part of the command.# update indices sudo apt update -qq # install two helper packages we need sudo apt install --no-install-recommends software-properties-common dirmngr # add the signing key for these repos wget -qO- https://cloud.r-project.org/bin/linux/ubuntu/marutter_pubkey.asc | sudo tee -a /etc/apt/trusted.gpg.d/cran_ubuntu_key.asc # add the repo from CRAN sudo add-apt-repository "deb https://cloud.r-project.org/bin/linux/ubuntu $(lsb_release -cs)-cran40/" # install R itself sudo apt install --no-install-recommends r-base - Installing the RStudio Server IDE:
# install dependencies sudo apt install -y r-base-core r-recommended r-base-dev gdebi-core build-essential libcurl4-gnutls-dev libxml2-dev libssl-dev sudo apt install --no-install-recommends gdebi-core # cd ~/Downloads # download the latest RStudio Server .deb file wget https://download2.rstudio.org/server/jammy/amd64/rstudio-server-2025.05.1-513-amd64.deb # install the .deb file sudo gdebi rstudio-server-2025.05.1-513-amd64.deb # start the RStudio Server sudo systemctl start rstudio-server # enable RStudio Server to start on boot sudo systemctl enable rstudio-server - After installation of RStudio Server, check you can access it by:
- Opening a web browser and navigating to
http://localhost:8787. - Logging in with the username and password you used when you set up Linux / WSL2.
- Opening a web browser and navigating to
If you are using Windows and WSL2, the full in-depth instructions for installing R on WSL2 can be found in this POSIT article.
The Bash Shell
Bash is a commonly-used shell that gives you the power to do tasks more quickly.
Two options are available for setting up your device so that you’re ready to learn in our workshops with Microsoft Windows.
The first is Git for Windows (often referred to as “Git Bash”), and the second is Windows Subsystem for Linux v2 (“WSL 2”).
If you have a device provided by an institution that does not give you admin rights, please either request that they:
- Give you admin rights (temporarily or otherwise) to install WSL 2 yourself OR
- Install WSL 2 for you
If you experience any issues, please install Git for Windows using the instructions below.
Help! What should I use?
We recommend Git for Windows as the default bash experience for Windows users attending our workshops, as it is the most straightforward to install and use, and does not require admin privileges. However, it has limited functionality compared to a full Linux environment, and when you continue your data science learning after the workshop you will find that Git Bash does not support all the tools and workflows you might need. We recommend that after the workshop, you consider installing WSL 2 to get a more complete Linux experience within your Windows environment, and to have access to the full range of tools and software available on Linux.
Checking your Windows Version
Click on the Windows Start Menu button in the bottom left corner of your screen, or tap the Windows button on your keyboard, and type “System” in the search bar. Click the “System (Control Panel)” option. In the window that opens, there will be information about your current Windows system, including the version. Here is an example from Windows 11: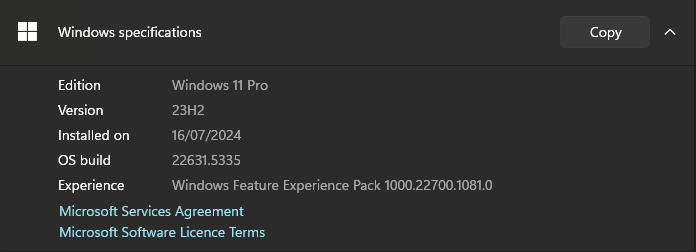 Depending on your version, please go to the relevant instructions below.
Windows XP/Vista/7/8
These versions of Windows are considered End Of Life, and are not recommended for use in modern data science. Software may experience issues, and security updates are also not available which puts your machine at risk. Please consider upgrading your Windows version if you are able to do this yourself, or speak with your local IT administrator to discuss options available to you to upgrade.If you are running any of these Windows versions, please install Git for Windows using the installation instructions below.
Windows 10 (earlier than version #1903)
For older versions of Windows 10 (version 1903/OS build 18362 and below), please follow the Git for Windows installation instructions below.
Windows 10 (version #1903 and later) and Windows 11
Windows 11 and later versions of Windows 10 support WSL 2, so following the workshop where you will use Git Bash, we recommend that you consider installing WSL2. If you are not comfortable installing WSL 2, please follow the Git for Windows installation instructions below.Installing Git for Windows
- Download the Git for Windows installer.
- Run the installer and follow the steps below:
- Click on "Next" four times (two times if you've previously installed Git). You don't need to change anything in the Information, location, components, and start menu screens.
-
From the dropdown menu, "Choosing the default editor used by Git", select "Use the Nano editor by default" (NOTE: you will need to scroll
up to find it) and click on "Next". - On the page that says "Adjusting the name of the initial branch in new repositories", ensure that "Let Git decide" is selected. This will ensure the highest level of compatibility for our lessons.
- Ensure that "Git from the command line and also from 3rd-party software" is selected and click on "Next". (If you don't do this Git Bash will not work properly, requiring you to remove the Git Bash installation, re-run the installer and to select the "Git from the command line and also from 3rd-party software" option.)
- Select "Use bundled OpenSSH".
- Ensure that "Use the native Windows Secure Channel Library" is selected and click on "Next".
- Ensure that "Checkout Windows-style, commit Unix-style line endings" is selected and click on "Next".
- Ensure that "Use Windows' default console window" is selected and click on "Next".
- Ensure that "Default (fast-forward or merge) is selected and click "Next"
- Ensure that "Git Credential Manager" is selected and click on "Next".
- Ensure that "Enable file system caching" is selected and click on "Next".
- Click on "Install".
- Click on "Finish" or "Next".
-
If your "HOME" environment variable is not set (or you don't know what this is):
- Open command prompt (Open Start Menu then type
cmdand press Enter) -
Type the following line into the command prompt window exactly as shown:
setx HOME "%USERPROFILE%" - Press Enter, you should see
SUCCESS: Specified value was saved. - Quit command prompt by typing
exitthen pressing Enter
- Open command prompt (Open Start Menu then type
This will provide you with both Git and Bash in the Git Bash program.
Installing WSL 2
If you are confident to try installing WSL 2 rather than Git Bash, please use the following instructions.
We will install Ubuntu via the Microsoft Store.
It is possible to install WSL within the Windows Powershell command prompt, and full instructions are on the Microsoft website.
Note: You will need to restart your computer after installing WSL 2, so make sure you have saved any work.
Why Ubuntu?
Linux comes in many flavours, called “distributions”, and each has its own benefits, features and quirks!
WSL 2 is a fully fledged Linux environment that runs completely within your Windows 10 or 11 operating system. While there are many Linux distributions available to install (e.g. Ubuntu, Debian, Fedora, Mint, Arch, Gentoo, and hundreds more!), WSL 2 only supports a handful of distributions listed above due to the way it needs to be integrated with Windows itself.
So, we will use the default that WSL 2 recommends, Ubuntu.
Via the Microsoft Store:
- Open the Windows Start Menu button in the bottom left corner of your screen (four blue squares), or tap the Win Windows button on your keyboard (between the bottom left CTRL and ALT keys) and search “store”. Open the Microsoft Store.
- In the Microsoft Store search bar, type “wsl ubuntu”, and select the Ubuntu 22.04 or 24.04 option (at the time of writing,
Ubuntu 22.04.06 LTS, orUbuntu 24.04.01 LTS):- If a pop-up window appears asking if you want to make changes to your device, select “Yes”
- The install should proceed, and this can take a few minutes depending on your PC performance and internet download speed.
- Once installed, restart the computer.
- Once restarted, reopen the Windows Start Menu button in the bottom left corner of your screen, or tap the Windows button on your keyboard. In the search bar, type either:
Ubuntu: selectingUbuntu 22.04.06 LTSorUbuntu 24.04.01 LTSfrom the Start Menu will open the bash prompt directly, orTerminal: this will open a new Windows Terminal window, which will look like a blank black window with a blinking cursor waiting for input. Note: This terminal might default to Powershell, and not Ubuntu. If this is the case, click the down arrow in the Terminal window menu bar at the top, and then click Ubuntu 22.04 or 24.04, depending on the version you installed. It will also show keyboard shortcuts (e.g. Ctrl+Shift+1) to open the various prompts available within the Terminal application.
- Follow the Installing software within WSL 2 section below.
Installing software within WSL 2
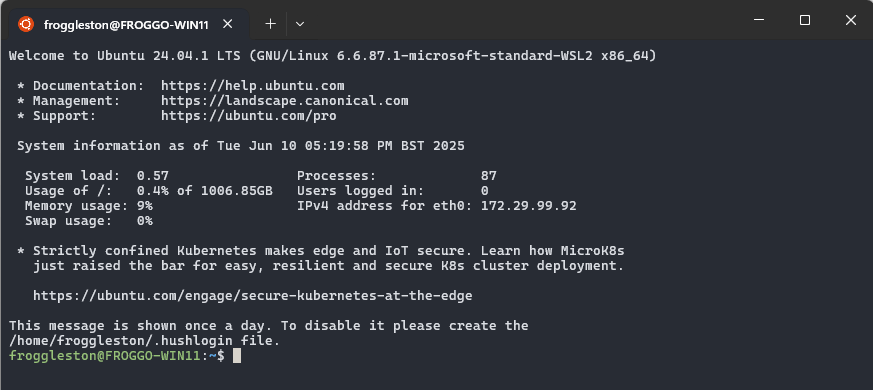
Once you have installed WSL 2, you will need to install some software within the Ubuntu operating system in order to use it effectively. Make sure you are using Ubuntu by checking you see the bash prompt:
The first thing to do is to update the list of available Ubuntu software packages, using a tool called apt.
Type the following command into the bash prompt:
sudo apt update
Note: You will be prompted to enter your password. This is the password you set when installing Ubuntu, and will not show up on the screen as you type it in. This is a security feature of the terminal, and is normal behaviour.
Install updated versions of the base packages required across all our lessons, by typing:
sudo apt install git build-essential autoconf automake libtool python3 r-base
You're all set!
If you get stuck, please contact your workshop organisers to get assistance before the workshop starts.
The default shell in Mac OS X Ventura and newer versions is Zsh, but
Bash is available in all versions, so no need to install anything.
You access Bash from the Terminal (found in
/Applications/Utilities).
You may want to keep Terminal in your dock for this workshop.
To see if your default shell is Bash type echo $SHELL
in Terminal and press the Return key. If the message
printed does not end with '/bash' then your default is something
else, you can change your current shell to Bash by typing
bash and then pressing Return. To check
your current shell type echo $0 and press Return.
To change your default shell to Bash type chsh -s /bin/bash and
press the Return key, then reboot for the change to take effect. To
change your default back to Zsh, type chsh -s /bin/zsh, press the
Return key and reboot. To check available shells, type
cat /etc/shells.
The default shell is usually Bash and there is usually no need to install anything.
To see if your default shell is Bash type echo $SHELL
in Terminal and press the Return key. If the message
printed does not end with '/bash' then your default is something
else, you can change your current shell to Bash by typing
bash and then pressing Return. To check
your current shell type echo $0 and press Return.
To change your default shell to Bash type chsh -s /bin/bash and
press the Return key, then reboot for the change to take effect. To
change your default back to Zsh, type chsh -s /bin/zsh, press the
Return key and reboot. To check available shells, type
cat /etc/shells.
SQLite
SQL is a specialized programming language used with databases. We use a database manager called SQLite in our lessons.
- Run "Git Bash" from the Start menu
- Copy the following
curl -fsSL https://carpentries.github.io/workshop-template/getsql.sh | bash - Paste it into the window that Git Bash opened. If you're unsure, ask an instructor for help
- You should see something like
3.27.2 2019-02-25 16:06:06 ...
If you want to do this manually, download sqlite3, make a bin directory in the user's home directory, unzip sqlite3, move it into the bin directory, and then add the bin directory to the path.
SQLite comes pre-installed on macOS.
SQLite comes pre-installed on Linux.
- In case of problems: register for an account at https://www.pythonanywhere.com
- Download survey.db
- Click on files and upload survey.db
- Click on dashboard and Choose new console
bash
If you installed Anaconda, it also has a copy of SQLite
without support to readline.
Instructors will provide a workaround for it if needed.
Install the videoconferencing client
If you haven't used Zoom before, go to the official website to download and install the Zoom client for your computer.
Set up your workspace
Like other Carpentries workshops, you will be learning by "coding along" with the Instructors. To do this, you will need to have both the window for the tool you will be learning about (a terminal, RStudio, your web browser, etc..) and the window for the Zoom video conference client open. In order to see both at once, we recommend using one of the following set up options:
- Two monitors: If you have two monitors, plan to have the tool you are learning up on one monitor and the video conferencing software on the other.
- Two devices: If you don't have two monitors, do you have another device (tablet, smartphone) with a medium to large sized screen? If so, try using the smaller device as your video conference connection and your larger device (laptop or desktop) to follow along with the tool you will be learning about.
- Divide your screen: If you only have one device and one screen, practice having two windows (the video conference program and one of the tools you will be using at the workshop) open together. How can you best fit both on your screen? Will it work better for you to toggle between them using a keyboard shortcut? Try it out in advance to decide what will work best for you.