Content from Online Workshops Module 1: Know Your Tools
Last updated on 2023-04-21 | Edit this page
Overview
Questions
- How do you use Zoom host and co-host features?
- What do workshop attendees need to know about interacting on Zoom?
Objectives
- Use Zoom host and co-host features to create breakouts, screen share, manage muting and more.
- Create a plan to communicate with learners during a workshop.
This workshop in intended to be taught by two people. The Discussion Lead should be a Carpentries Instructor Trainer and the Zoom Lead may be a Trainer or Instructor.
Discussion Lead: Introduces the workshop, facilitates icebreakers and discussions of all activities except Activity 0 (using Host powers in Zoom).
Zoom Lead: Assumes (& transfers) “host” role in Zoom, manages breakouts & waiting room, monitors chat, mutes noise, keeps time. Facilitates Activity 0. If you wish to demonstrate Zoom captioning, the Zoom Lead can take on this role when participants introduce themselves, since it is not necessary to take notes then.
The introductory procedures for this workshop should present an ideal model to attendees. This means paying attention to all the details, even though some may feel less necessary for a short and small event of this kind. Later activities can then reference practices displayed here.
*Hello! My name is [ name ] and I will be your Discussion Lead for today. As a Carpentries event, this workshop is covered by The Carpentries Code of Conduct. That means we will all bring our best selves to support each other in preparing to teach online here today. If you have any concerns you will find links for reporting in the Etherpad.
Before we get started I want to be sure that we all have a plan should anyone lose their connection, including me. We will be using the Etherpad to keep notes and links. You will find a link to rejoin this meeting there, as well as links to the curriculum. Please be sure you have the Etherpad link available someplace other than our meeting chat. You may be able to send messages there if your call drops. If I lose connection, our Zoom Lead, [ name ] will take over. If the call ends, you should be able to reconnect using the information you originally came with. Should we have a general failure I will contact folks by email when I can. This is a 3 hour workshop with a 15 minute break in the middle. We will take our break at 30 minutes past the next hour regardless of where we are in the curriculum at that time.
The curriculum is primarily for reference outside the workshop, so don’t worry about trying to display it or juggling it with your Zoom screen. You may want to take a moment to arrange your windows so that you can see the Etherpad and Zoom at the same time. If you prefer to alternate, I will also tell you when we need to move between them. If you need any direct assistance during the workshop, you may message [name of Zoom lead] in the chat. Note that you can send private messages by selecting someone’s name in the dropdown next to the “To:” in the chat window.
In the first exercise, we’ll be doing Introductions – in addition to breaking the ice, we will also be practising one mode of handraising. As we will discuss there are many ways to raise hands in Zoom, and you may try them all, but writing “hand” in the chat is the method I’ll be paying most attention to today. Please open the Etherpad using the link in the chat if you have not already done so, sign in there, and then write “hand” in the chat.*
(Optional) During your Introductions [name of Zoom lead] will be demonstrating Zoom’s manual captioning feature. They will transition to taking notes in the Etherpad after that.
Introduce yourself! (10 min)
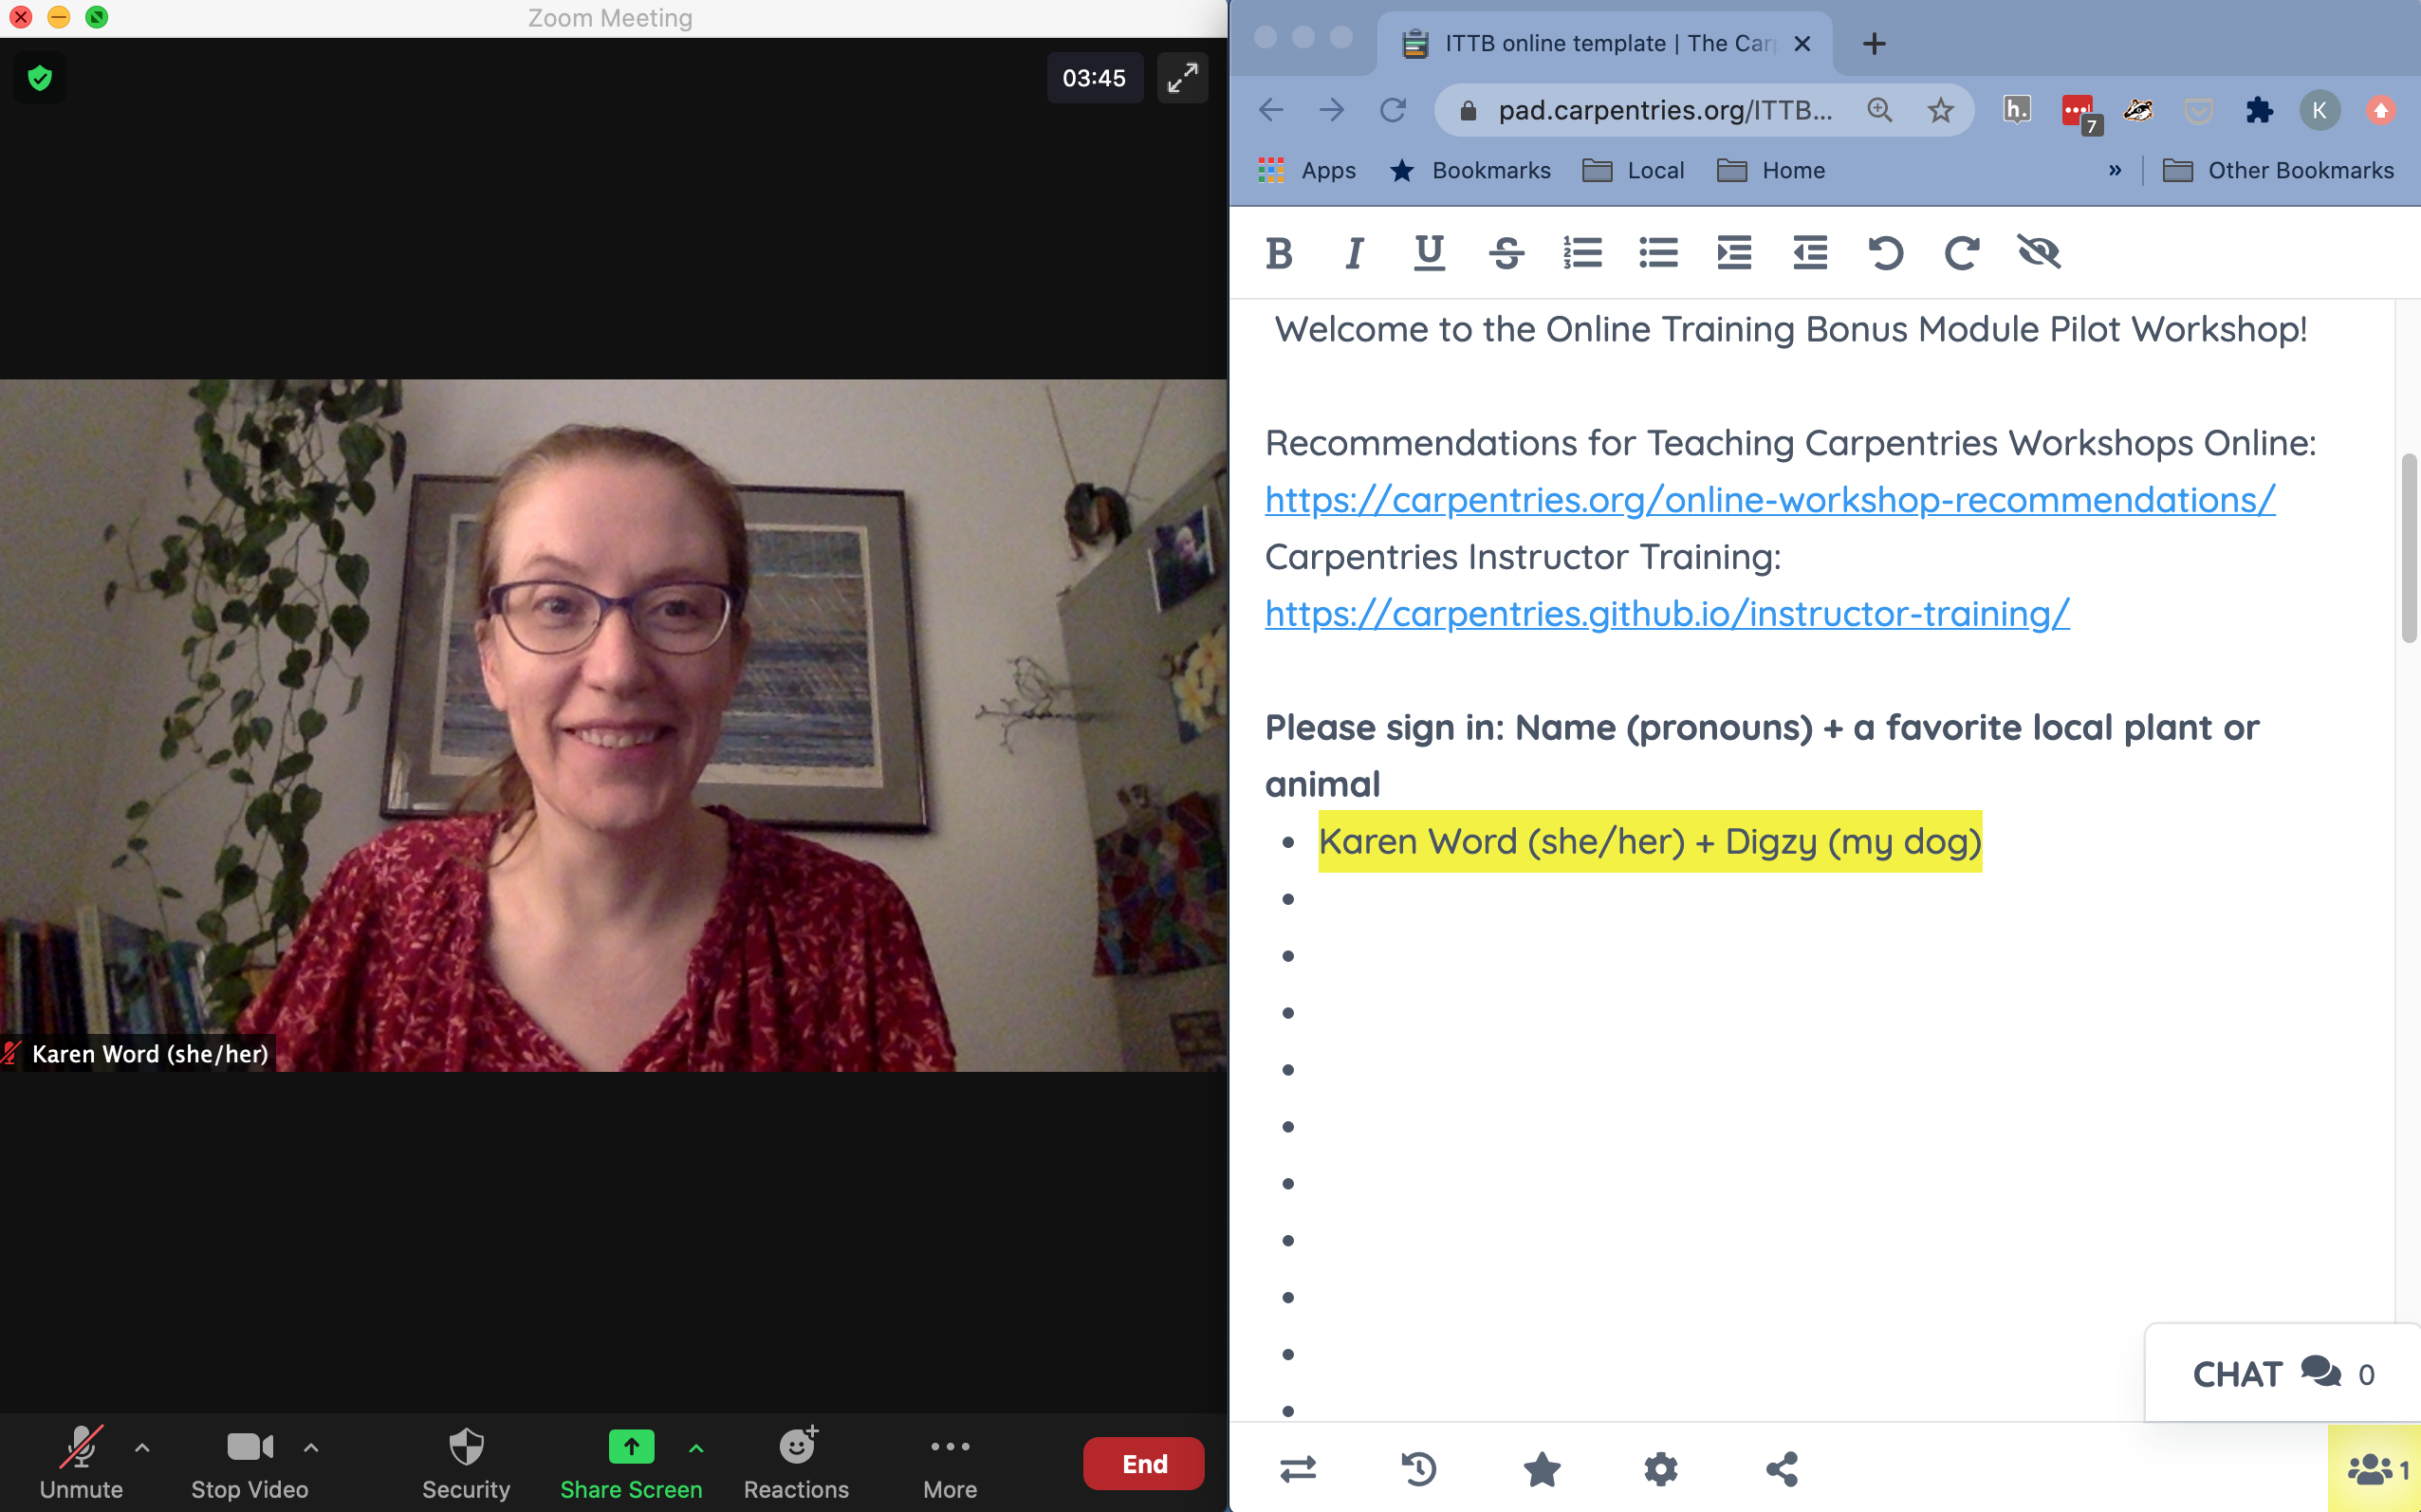
In the Etherpad, please sign in with your name, pronouns, and a fun fact about your local area. Note that you can customize your color at the top right. Also, in Zoom, please adjust your name as needed and add pronouns. You can do this by clicking the drop-down to the right of your name in the participants window.
When you are finished, please raise your hand by writing “hand” in the chat. When the Trainer calls on you, unmute and briefly say your name and location (city, country). We’ll save the fun facts for your first breakout sessions.
Introduction (5 min)
Prior to 2020, The Carpentries discouraged online workshops. This is because a number of Carpentries teaching practices do not naturally transfer to a video conferencing platform. Among the challenges:
- A video conferencing window occupies space on a learner’s computer.
- Learners’ faces are hidden which makes it much harder for the instructional team to evaluate how learners are handling the material by observing facial expressions.
- No sticky notes! And asking learners to raise their hands in the chat can be confusing.
- Side conversations present a challenge. In a video conference it’s not possible to talk quietly in the back of the room while instruction continues.
- Helpers can’t “drive.” As much as we recommend against typing on a learner’s machine, this is sometimes necessary for complex problems. Remote control of learner machines is not straightforward.
- Socialization doesn’t ‘just happen’. Learners can’t chat with a neighbor or socialise around the snack table during a break.
We will talk about each of these challenges in the course of this workshop.
In the first part of the workshop, we will talk about technology. You will get some practice using the tools we use, some opportunities to discuss their merits and alternatives, and some time to think through what kind of onboarding your learners will need to participate successfully!
After the break, we will come back to talk about teaching. Everything you learned in The Carpentries Instructor Training workshop still applies, but how? We will talk about the mechanics of an online workshop – how technology and teamwork can create a positive learning environment in your workshop.
Please note that this workshop is intended to supplement, but not to replace The Carpentries Recommendations for Teaching Carpentries Workshops Online. Be sure to read those recommendations carefully, and check for useful updates each time you teach!
How to Host a Workshop: a technical guide (20 min)
The video conferencing platform used by The Carpentries is Zoom. However, your hosting organisation may have another platform.
What platform will you use?
In the Etherpad, please indicate with an “X” which platform you will be using for your workshop. If you do not see yours listed, please add it.
- Zoom
- Jitsi
- WebEx
- Skype
- Blackboard
- Google Meet or Hangouts
- Teams
- Other (please add!)
We will now spend a little time discussing and demonstrating the host role on Zoom. We will also have an activity that you will rotate through in groups throughout the workshop, where you will have an opportunity to test the host controls. However, if you have questions about other platforms at any point during the workshop, please ask – and answer, if you can! – any questions specific to your platform in the space under your platform name on the Etherpad. Questions that cannot be addressed during the workshop will be directed to our infrastructure team, so be sure to add your email address if you would like us to follow up!
Hosting on Zoom
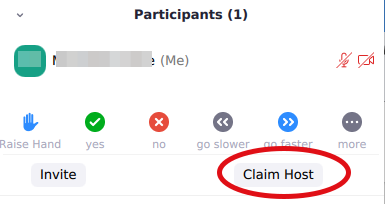
When you enter a Carpentries Zoom room, you will not have host controls. One person on your instructional team will use a “host key” provided in your introductory email to “Claim Host”. The button looks like this:
Once host has been claimed, you can only become the host when a current host passes that status to you.
As host, you can:
Pass host or assign a co-host. Co-hosts have some of the same privileges as hosts. We recommend that the person teaching use a co-host role, and leaving host powers for someone who has their full attention on managing the meeting.
Enable and move participants to a waiting room. This allows you to admit people individually and adds a layer of protection against “zoombombers.” The host can communicate with people in waiting rooms by issuing announcements. People in the waiting room can not message the host. Take care to press “Admit” if you want to let someone back in – “Remove” can sound like a good idea but will kick the person out of the meeting, in some cases permanently.
Mute participants or request they unumute themselves. In Carpentries rooms, participants are allowed to unmute themselves by default, but this setting can be changed by the host or co-host if you want or need to enforce muting.
Turn off (but not on) participants’ video. Rather than turning the video back on, Zoom will send a request to the participant to activate their video.
Create and manage breakout rooms. Breakout rooms are useful for socialisation and group activities. We suggest creating an extra room or two just in case.
Control screen sharing. In Carpentries rooms, only the host can screen share by default. However, the host can change the screen sharing permissions to allow co-hosts and/or participants to screenshare.
End meeting for all. If you have host powers and depart the meeting, take care not to take everyone else with you if the workshop is not finished! If you do not end the meeting, Zoom will prompt you to pass off host to another participant before you leave.
Zoom updates features frequently, so it is important to expect the unexpected! Making sure that everyone is running the most up-to-date version of Zoom can help, but invariably a percentage of attendees will not remember to update. In addition, you may also find that features you were planning to use have changed with new updates. When in doubt, check the release notes for the latest version (or three).
Activity Session 0 (to be carried out in parallel with other activities)
- Group 1 takes turns
- Receiving host status
- Assigning co-host status (to another group member)
- Muting/unmuting another group member
- Sending a participant to the waiting room (a group member who is not co-host) and re-admitting them
- Screensharing (where did all the buttons go?)
- Adjusting who can share their screen
- Managing, messaging, and visiting breakouts (but not creating them)
- Closing the breakout rooms (if you are the last group member to act as host)
- Assigning host to someone else (either to another group member, or if everyone has had a turn as host, back to the instructor)
The following list may be pasted into the Zoom chat for participants’ reference: Assign a co-host Mute/unmute Send group member to waiting room Share screen Adjust who can share screen Breakouts: manage, message, visit (if last) Close breakouts Reassign host
Since this activity will be carried out during other activities, be aware that people will be playing with the host features for our meeting during your breakout sessions! This will mean someone might enter your breakout room for a visit, or you might see a silly message posted from time to time. If any other strange things happen… please be patient with us! :)
Resources:
- For more details, see the section on Zoom in The Carpentries Handbook.
Interacting with your Learners Online (40 min)
At all Carpentries workshops, we take the quality of our communications seriously. We communicate to inspire, to re-frame errors as opportunities for learning, and, of course, to teach. At an in-person workshop, we communicate with words, with sticky-notes, with smiles and gestures and glances and reassuring presence.
Online, most of these communication routes need a new home. In a video conference, only one person can speak at a time. Want to raise your hand? Writing “hand” in the chat as we did above is not the only route, nor is it normally the first thing new users will try. You might:
- wave at the camera (if video is on)
- unmute yourself and try to cut in
- discover a little hand-like symbol and click it
- add your question/comment to the chat instead
- freeze, with an acute case of “analysis paralysis”
Then, there is the problem of side conversations. In a video conference, unless you create breakout rooms, all vocal communication is shared with the entire workshop. One natural outlet for these conversations is the chat… but if that is your only outlet, social clutter can make it unusable.
We have all had some practice with video meetings by now, and unless you are exceptionally lucky you have had a few experiences that might contribute to your ideas about what not to do.
During this activity, you will begin by spending about 5 minutes brainstorming with your group to think through some worst-case scenarios for communications between learners and the instructional team, or within the instructional team.
Activity Session 1 (20 min):
-
Groups 2+:
- Introduce yourselves!
- Assign group roles: moderator, time keeper, note-taker. Also, designate one person to share a few key points or questions with the class when you return. Plan to rotate these roles as much as possible/practical as we move through the activities today.
- Consider one of the following scenarios:
- Total Eclipse of the Chat: Instructor is talking and someone (or multiple people) have a question, but the Instructor is not paying attention to the conference chat.
- Which Chat?: A learner asks for help using the Etherpad chat, when all the helpers are watching the Zoom chat. They are stuck for a long time without help.
- Banter Blast: A group of enthusiastic learners uses the Zoom chat for a side conversation about favorite related tools. A request for help gets lost in the noise.
- Help the Helper: A helper engages with a learner and encounters a problem they don’t know how to solve. Now the helper needs help and isn’t sure how to proceed.
- Which Hand?: You have asked learners to raise hands by writing “hand” in the chat, but one person is waving at the screen, another is using the ‘raise hand’ button, and neither is being called on by the Instructor.
- Breakout Amnesia: Learners have entered breakout rooms to complete an activity. Once they are there, they realize they do not understand the prompt, but do not know how to ask for help.
- Draft solutions or pre-emptive plans to create a best-case scenario for communications during your workshop. Write some notes in the Etherpad. If you have time remaining, consider a second scenario or invent your own.
-
Group 1:
- Introduce yourselves!
- Complete Activity 0 in cooperation with your Trainer
- Take note of the role assignment instructions above for your next activity session.
Additional resources: Coderefinery learner’s guide to zoom
Keeping Time
There are many ways to keep time during activities, but here are two suggestions that allow everyone to keep track of how much time is left:
Zoom Countdown Timer: Zoom has an option to set a countdown timer for breakout rooms. After creating the breakout rooms, click Options to view additional breakout rooms options. Check Set Countdown timer: If this option is checked, the participants will be given a countdown of how much time they have left before being returned to the main room. A box can be checked to give you the option of keeping rooms open; otherwise they will automatically close when the timer runs out.
Cuckoo Timer: Cuckoo timer is a website where you can set a timer and share it with other people via a link.
BREAK
Key Points
- Hosting features in Zoom are most useful when operated by someone who is not also trying to teach.
- Communications avenues should be planned and taught for an online workshop to function smoothly.
Content from Online Workshops Module 2: Making the Dream Work
Last updated on 2023-04-21 | Edit this page
Overview
Questions
- What goes into planning an online workshop?
- What does an optimal learner experience look like? What can get in the way?
- How can I make my workshop maximally inclusive?
- “What do I do if my learners are unable to install the software?”
Objectives
- Write and rehearse an introduction to the nuts and bolts of your online workshop.
- Propose communications strategies for your instructional team.
Setting the Stage for a Positive Learner Experience (30 min)
In Part 1 of this lesson, we talked about the importance of the right tool at the right time in setting the stage for a motivating, focused workshop experience. But, there is more to communication than choosing a platform!
The Learner Experience: Challenges and Opportunities (5 min)
Online learners are most often joining your workshop from home and will very likely be teaching or helping from home!
‘Home’ can look very different to different people. Sometimes, features of a home environment can impact participation in an online workshop. Some effects can be positive, but some can create barriers as well! Consider the home enviroment and equipment along with other potential accessibility issues, and plan accommodations wherever possible.
Breaking Down the Learner Experience
Optimal elements:
- understands the instructor
- can keep up with live coding
- feels comfortable asking for help
- feels like they ‘belong’ at the workshop
- leaves feeling like they can continue to learn skills
Barriers:
- internet
- home technology setup (small screen, poor audio/video, installation failures)
- household distractions (e.g. kids!)
- ‘Zoom fatigue’
- other accessibility (e.g. need for audio or visual accommodations)
Solutions:
- Direct learners to curriculum in case they lose connection or need to step away. Follow curriculum.
- Minimize window-switching and pause to allow learners to juggle screens e.g. when switching to a collaborative document
- Prepare to use cloud instances if needed, and also provide next steps for after the workshop to learners who use them.
- Utilize ice-breakers and group activities to help learners feel more comfortable and connect your community
- Plan for breaks, post the times, and stick to them
- Consider whether and when to ask learners to turn on their video
- Where captioning is not an option, assigning a note-taker to directly transcribe
Getting Off to a Good Start (5 min)
Creating a welcoming environment for your learners starts with teaching them how they can participate in your workshop.
At the beginning of this workshop, your Trainer took several steps to teach you how to participate in this workshop. What kinds of things did they do? What else could they have included?
In addition to introducing the exciting content of your workshop, your learners need to know what to expect and how to behave. This should include:
- The workshop schedule (including break times)
- The Code of Conduct
- The Emergency Plan
- How to use the technology (e.g., conferencing platform features, chat, collaborative notetaking document)
- Communication norms (e.g., How to ask questions, how to indicate when you are ok or stuck)
- How to arrange windows on a single, small laptop screen
Activity Session 2 (20 min)
- Rotate group roles: moderator, time keeper, note-taker & sharer.
- Prepare a short (3 minute) segment of your introduction that will set your learners on a course for success.
- Rehearse! Give everyone a chance to present first, then exchange feedback, starting with feedback on yourself. Feedback should focus primarily on content, but delivery may be relevant too. Remember to include both targeted praise and constructive feedback.
- As time allows, share some similarities and differences in introductions within your group in the etherpad.
- Group 2 completes Activity 0
Planning Planning Planning (30 minutes)
At this point, you have done quite a bit of work towards planning your workshop. We hope that alone makes your time spent here worthwhile! However, a functioning workshop demands teamwork, and this is especially true in an online setting. For in-person workshops, a workshop can squeak by on a rough distribution of teaching duties with a quick helper orientation. Online, everyone needs to be on the same page or the workshop is really at risk. This means that, before your workshop, you will need to bring everyone together.
What makes a good meeting?
Elements of a good meeting
- A well-structured agenda
- Meeting roles
- Notes to record decisions & commitments for future reference
- Clearly assigned action items
- Central aims accomplished in allotted time
In the next activity session, you will work with your group to tease apart the preparation process, separating planning into before- during- and after-the-meeting phases.
Activity Session 3 (20 min)
Rotate group roles: moderator, time keeper, note-taker & sharer.
Take a deep breath, then spend a few minutes scanning the planning checklist in the Recommendations for Teaching Carpentries Workshops Online. This checklist is long! BUT, never fear – you are working as part of a team. Your team can handle it… if you communicate well!
-
Take a few moments to brainstorm the components of a solid team communication strategy. Consider the following questions:
- How will you communicate before the workshop?
- Identify one task that can be done asynchronously, and one task that likely requires a meeting
- How will you communicate during the workshop?
- What could go wrong with team communications, and how will you troubleshoot?
Group 3 completes Activity 0
Debrief (5 min)
Take a few moments to share some ideas or observations from each group’s discussion.
Resources: “Meetings, Meetings, Meetings” in Teaching Tech Together by Greg Wilson
Group Catch-up
Activity Session 4 (15 min)
Groups 1-3 should discuss or complete the activity they missed while doing Activity 0. When you finish, take a moment to think through what you have learned in this session. What questions or concerns do you still have about online training? We may not have time to address them all, but take a moment to add notes to the etherpad.
Group 4 completes Activity 0
A Few Notes on Cloud Instances (time permitting)
At Carpentries workshops, we want learners to use their own machines as much as possible. This leaves them more prepared to continue learning after the workshops. However, troubleshooting software installation problems can be a tremendous challenge even at an in-person event.
In online workshops, the inability to fully view or interact directly with a learner’s machine can make difficult problems functionally unsolvable. Therefore, The Carpentries now provides cloud instances for each curriculum, pre-loaded with all required software and data. These are intended to function as backups for learners who are experiencing significant installation difficulties.
There are two main types of cloud instances to be used for Carpentries workshops, each appropriate for different lessons:
-
RStudio Cloud
- R-based lessons
- Git lessons
-
MyBinder
- Python-based lessons
- Shell lessons (in the absence of R or Git)
RStudio Cloud
- Requires sign-in
- Starts up quickly
- Identical interface to RStudio
- Saves changes to the learner’s own account
- Does not include nano text editor (must use RStudio text editor)
MyBinder
- Does not require sign-in
- Can be slow to load if not used in previous 12 hours
- Identical interface to Jupyter Hub & Jupyter Lab
- Does not save to the cloud (must save notebooks and modified data to desktop and re-upload)
- Session stops after 10 minutes inactivity
- Non-private session means that login information should not be used. Do not connect to GitHub from MyBinder.
- Has nano text editor installed
If you register your Carpentries workshop with us, you will receive links to backup solutions for your event in a pre-workshop email sent by our workshop coordinators. This email will also include information about the caveats discussed above and a link to detailed instructions for learners, including screenshots. We recommend that you only share this information with those learners who have not successfully completed installation on their own computer once the workshop has begun.
Wrap-up
The Carpentries community is here to support your work! You may still have questions, and you will almost certainly develop more as you set about your preparations. What can you do with those questions?
Consider attending a Community Discussion! This is a great opportunity to discuss your thoughts and questions with experienced Carpentries Instructors as well as new trainees eager to learn from your conversation. This is also a great way to share your experiences and engage in retrospective analysis after your workshop is complete.
If you have questions about organizing your online workshop, you can also contact team@carpentries.org for assistance.
After your workshop, please also consider whether our Recommendations and the content of this Bonus module have served you well. If you would like to suggest changes to either, please file an Issue in the GitHub repository for this lesson, or email your suggestions to team@carpentries.org.
We would also really like to have your feedback now! If this module has helped you to feel more prepared, or if you think there are things we could improve, we would really appreciate hearing about this in our post-workshop survey. Please take a moment to share your feedback with us so that we can continue to improve our program!
Key Points
- Learners experience many barriers to participation in online workshops. Planning ahead and communicating well will support them in finding a path to success.
- Effective team work depends on communication.
- “Cloud instances can resolve software installation problems, but also have their own unique limitations.”