Transition Guide: From Styles to Workbench
Background
The Carpentries Workbench is a replacement for the former carpentries/styles lesson infrastructure. Lessons using The Carpentries Workbench have content separated from styling and build tools for a more seamless experience in updates to the lesson websites. In 2023, all lessons in official Carpentries lesson programs were converted to use the Workbench using the lesson-transition tool. We provide a documented transition workflow for lesson developers to follow if they want to convert their own lessons.
This document is intended to provide you with a quick reference about the differences between kramdown (used by styles) and pandoc-flavoured markdown (used by the Workbench):
For Maintainers
Default Branch
Workbench
The default branch is always main
styles
The default branch is gh-pages UNLESS you have rendered RMarkdown content, then the default branch is main
Infrastructure
Workbench
The Workbench infrastructure is independent1 from individual lessons. It consists of three major pieces of software.
- Git
- R
- Pandoc
The Workbench itself consists of three R packages, which can all be updated on the fly with no changes to the lesson.
- {sandpaper}: user interface and workflow engine
- {pegboard}: parsing and validation engine
- {varnish}: HTML templates, CSS, and JS elements
styles
The styles infrastructure is embedded within the lesson itself. It requires the following major pieces of software to run:
The styles workflow is a Jekyll-based workflow, which uses the following components:
- bundler: manages the Ruby gems (packages) including Jekyll
- Jekyll: static site generator
- (file)
Makefile: workflow management for building and validating - (dir)
assets/: CSS and JS elements - (dir)
_layouts/: HTML templates - (dir)
bin/: intialisation, runtime, and validation scripts (in BASH, Python, and R) - (dir)
_includes/: Markdown and HTML boilerplate for customisation
The file components can only be updated via pull request.
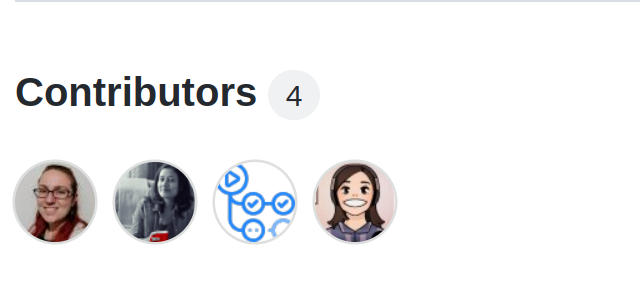
Contributor Count
Because content and tools are separated in Workbench Lessons, giving credit for the lesson is much more straightforward. Here we use Dr. Sarah Gibson’s Cross-Stitch Carpentry lesson as an example
Workbench
The Contributors reflect those that actually worked on the lesson itself.
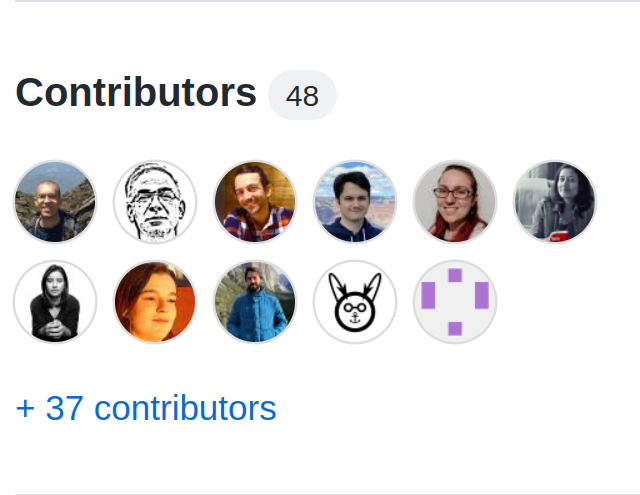
styles
The Contributors reflect those that worked on the lesson AND those that worked on the underlying infrastructure, going back to 2013.
Local Rendering
Workbench
- If you haven’t already, Follow the setup instructions for the Workbench to install R, pandoc, and the Workbench packages
- In your lesson directory, open either R, RStudio, or VS Code and run:
sandpaper::serve()styles
- If you haven’t already, Follow the setup instructions for styles to install Ruby, Bundler, Jekyll, Make, Python, and BASH
- In your lesson directory, open your command line and run:
make serveFolder Structure
The folders from styles to Workbench are rearranged to achieve the following goals:
- tools for building the lesson do not live in the lesson 4.
- the episodes can be directly lifted from the lesson without needing external context/resources.
- extra content intended for instructors is clearly separated from that intended for learners
Episodes (aka Chapters) will move from _episodes/ and _episodes_rmd to the single folder episodes/. _extras/ content will be split into learners/ and instructors/ depending on the context of the content. Figures, data, and files all become subfolders of episodes/. 
Setup Page
Workbench
The setup information lives in learners/setup.md or learner/setup.Rmd, depending on whether or not you need code generated. Access this file from episodes with
[setup instructions](../learners/setup.md)On the rendered site, the setup instructions are located on the home page at the #setup anchor.
styles
The setup information lives in the top level of the lesson at setup.md (no possibility to render generated content). Access this file from episodes with
[setup instructions]({{ page.root }}/setup.md)On the rendred site, the setup instructions are in a separate page called /setup
Callout Blocks/Special Blockquotes
Workbench
A callout block with the Workbench uses at least three colons followed by a keyword to start a block. The block is closed with at least three colons.
You can find a demonstration of all the possible callout blocks in the Workbench component guide
:::: callout

#### Act Openly

We believe that transparency, honesty, and fairness are keys to fostering
trust within an open community.

::::::::::::These are called fenced divs and in Workbench lessons, you will often see them have many more colons to clearly delineate sections in a lesson. The number of opening colons and the number of closing colons do not match and it is completely up to the lesson author to choose a style.
styles
A callout block (aka “Special Blockquote”) with styles used block quote syntax and level 2 headers followed by a postfix tag declaring the class of block
You can find a demonstration of all the possible callout blocks in the styles “Special Blockquotes” guide
> ## Act Openly
>
> We believe that transparency, honesty, and fairness are keys to fostering
> trust within an open community.
>
{: .callout}The decision to use blockquotes was to facilitate an easy way to author special sections without having lesson authors/contributors type <div> tags into the document.
Highlighted Code Blocks
Workbench
Code fences in the Workbench are indicated by fences that consist of three backticks (```) with the name of the language appended on the opening fence:
clean all merged branches from git

```bash
git branch --merged | grep -v '^\*' | xargs git branch -d
```
styles
Code fences in styles follow kramdown syntax, which prefers fences that consist of three tildes (~~~) with the liquid tag of the language appended on a new line after the closing fence (postfix tag):
clean all merged branches from git

~~~
git branch --merged | grep -v '^\*' | xargs git branch -d
~~~
{: .language-bash}
Challenge/Solution blocks
Workbench
The challenge and solution blocks in the Workbench are nested pairs of blocks with an optional Level 3 header. You can additonally add a “hint” block before the solution.
::::::::::::::::::::::::::::: challenge

### Challenge: build

What is the R command to build a Workbench lesson?

::::::: hint

This command is going to start a **serve**r on your computer

:::::::::::::

::::::::: solution

```r
sandpaper::serve()
```

::::::::::::::::::
:::::::::::::::::::::::::::::::::::::::To help distinguish sections, double the number of columns for the outer section compared to the inner section.
styles
The challenge and solution blocks in the Workbench are nested block quotes with Level 2 headers. Additional blocks are still of the class “solution”
> ## Challenge: build
>
> What is the R command to build a Workbench lesson?
>
> > ## Hint
> >
> > This command is going to start a **serve**r on your computer
> >
> {: .solution}
>
> > ~~~
> > sandpaper::serve()
> > ~~~
> > {: .language-r}
> {: .solution}
{: .challenge}
Questions/Objectives/Keypoints
Workbench
Questions and Objectives appear at the top of the lesson as fenced divs with list elements:
---
title: "Bomp"
teaching: 5
exercises: 5
---

::::::::::::::::: questions

 - Who put the **bomp** in the bomp bah bomp bah bomp?
 - Who put the **ram** in the rama lama ding dong?

:::::::::::::::::::::::::::

::::::::::::::::: objectives

 - Solve the "bomp" mystery.

::::::::::::::::::::::::::::

## Introduction

...
Keypoints should go in a fenced div at the end of the document:
...

::::::::::::::::: keypoints

 - We will never know who put the bomp in the bomp bah bomp bah bomp.

:::::::::::::::::::::::::::
styles
The questions, objectives, and keypoints were placed in the YAML metadata for each episode:
---
title: "Bomp"
teaching: 5
exercises: 5
questions:
 - "Who put the bomp in the bomp bah bomp bah bomp?"
 - "Who put the ram in the rama lama ding dong?"
objectives:
 - "Solve the \"bomp\" mystery."
keypoints:
 - "We will never know who put the bomp in the bomp bah bomp bah bomp."
---

## Introduction

...It was not possible to include markdown inside these strings and it often caused errors due to missed quotation marks (i.e. - "sentence with a period after quotes". was a common type of error.)
This content was originally introduced into the YAML metadata so that we could use Jekyll’s metadata parsing to create a custom introductory block.
Instructor notes
Workbench
An inline instructor note in the Workbench is formed inside an episode by making a fenced div with the class “instructor”
:::: instructor

Here be dragons

::::::::::::
Instructor notes for the whole lesson can be placed in instructors/instructor-notes.md
styles
Instructor notes do not exist in styles other than an aggregate markdown file called _extras/guide.md
Lists
Workbench
In general, if something does not work in Markdown, try adding a blank line. This is true for lists.
A list must start and end with a blank line to be rendered properly:
A list of things

- shoes
- coat
- glasses

text after the list
A list of things
- shoes
- coat
- glasses
text after the list
A list of things
- shoes
- coat
- glasses

text after the list
A list of things - shoes - coat - glasses
text after the list
Lists in fenced divs behave the same way and a common mode of failure is to create a list inside a fenced div that does not have space around it:
::: callout
- one
- two
- three
:::
This will result in a callout that has this content. Moreover, the lesson build will fail to validate:
- one
- two
- three :::
Instead, please make sure you add blank lines around your list like this:
::: callout

- one
- two
- three

:::
styles
Jekyll is very forgiving for lists in general, so a blank line before the list is optional
A list of things
- shoes
- coat
- glasses

text after the list
A list of things
- shoes
- coat
- glasses
text after the list
Tables
Please note that the table display here is not a good representation of what you will see in the Workbench or in Styles. They both have their own idiosyncratic ways of displaying tables.
A demonstration of Workbench tables can be seen in the official documentation for lesson contributors
.workbench
Workbench
Tables in the Workbench follow the rules for pandoc pipe table syntax.
There are two extra features for this syntax in pandoc:
- You can add a table caption, which is great for accessibility5
- You have control over the relative width of oversized table contents
Table: A table of fruits and prices

| fruit  | price  |
| ------ | -----: |
| apple  | 2.05   |
| pear   | 1.37   |
| orange | 3.09   |
| devil | 666.00 || fruit | price |
|---|---|
| apple | 2.05 |
| pear | 1.37 |
| orange | 3.09 |
| devil | 666.00 |
To control the width of columns in the table, adjust the number of - in the separator between the header and the table body. This table has three columns with a 2:1:1 ratio (as noted by the |----|--|--| header)
Table: summary of relevant statistical tests for normally and non-normally distributed data

|Analysis required (continuous data) |Normally distributed data | Non-normally distributed data |
| ----                               | --                       | --                            |
|Compare mean or median of one sample group against a known value |One sample t-test |Wilcoxon Rank Sum test |
|Compare means or medians of two sample groups (unpaired data) |Unpaired t-test |Mann-Whitney test |
|Compare means or medians of two sample groups (paired data) |Paired t-test |Wilcoxon Matched Pairs test |
|Compare means or medians of ≥ three sample groups (unpaired data) |ANOVA |Kruskal-Wallis ANOVA |
|Compare means or medians of ≥ three sample groups (paired data) |Repeated measures ANOVA |Friedman test || Analysis required (continuous data) | Normally distributed data | Non-normally distributed data |
|---|---|---|
| Compare mean or median of one sample group against a known value | One sample t-test | Wilcoxon Rank Sum test |
| Compare means or medians of two sample groups (unpaired data) | Unpaired t-test | Mann-Whitney test |
| Compare means or medians of two sample groups (paired data) | Paired t-test | Wilcoxon Matched Pairs test |
| Compare means or medians of ≥ three sample groups (unpaired data) | ANOVA | Kruskal-Wallis ANOVA |
| Compare means or medians of ≥ three sample groups (paired data) | Repeated measures ANOVA | Friedman test |
Table: table to demonstrate a wrapped cell

| with wrapping | without wrapping |
| --            | ------           |
| This is a lot of text for a very tiny cell. It almost certainly will be wrapped. | This is a lot of text for a wider cell. It will not wrap so soon. || with wrapping | without wrapping |
|---|---|
| This is a lot of text for a very tiny cell. It almost certainly will be wrapped. | This is a lot of text for a wider cell. It will not wrap so soon. |
styles
Jekyll tables are the same syntax, but with no ability to add captions or control width:
| fruit  | price  |
| ------ | -----: |
| apple  | 2.05   |
| pear   | 1.37   |
| orange | 3.09   |
| devil | 666.00 || fruit | price |
|---|---|
| apple | 2.05 |
| pear | 1.37 |
| orange | 3.09 |
| devil | 666.00 |
Internal Links
Workbench
Links in the Workbench are relative to the file so that you can link to the files and confirm they work in the github preview. Figures, files, and data are nested inside the episodes/ folder.
<!-- Next Episode -->
[next episode on dragons](dragons.md)
<!-- Data -->
[download the dragon data for this episode](data/dragon-lifespan.csv)
<!-- Setup -->
[setup instructions](../learners/setup.md)
styles
Links are relative to the page that they are rendered to. You should use the { page.root } variable and the link tag in order to construct the correct path to the resource:
<!-- Next Episode -->
[next episode on dragons]({{ page.root }}{% link _episodes/dragons.md %})
<!-- Data -->
[download the dragon data for this episode]({{ page.root }}/data/dragon-lifespan.csv)
<!-- Setup -->
[setup instructions]({{ page.root }}/setup.md)
Figures
Workbench
Figures are written with the caption in the square brackets and alt appended as an attribute like so: {alt='image description'}.
{alt='a red baby
dragon head sticks out from its egg'}There is a valid reason behind this choice: text inside of the square brackets can be formatted as markdown, so it makes sense for the caption. Alt text needs no decoration as it will be descriptive.
styles
Figures are written with alt text in the square brackets, but no caption like so: 

The dragon emerges!For Instructors
Navigation
Workbench
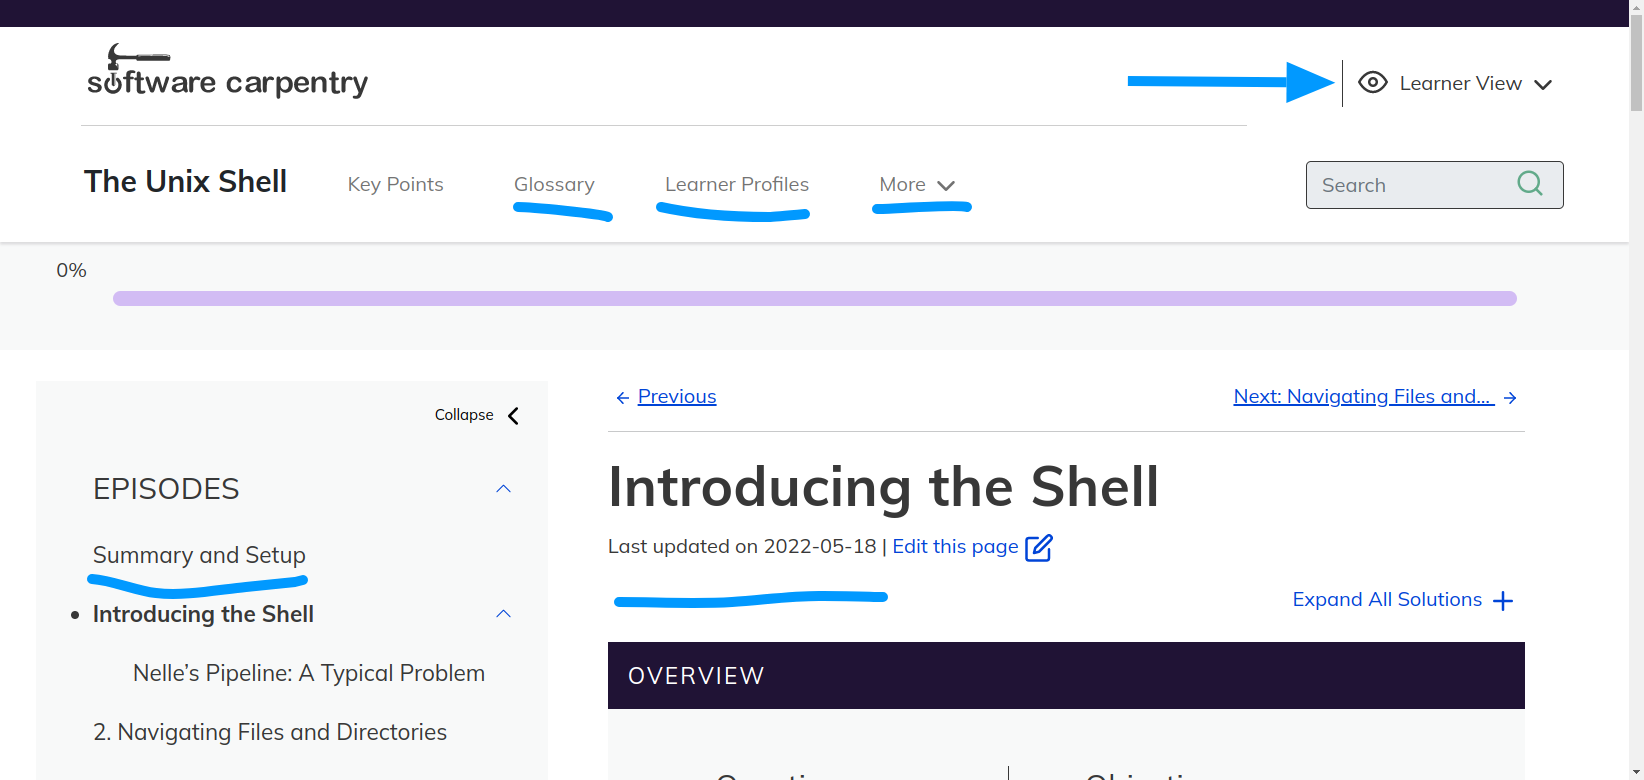
Episode and setup information is located on the left hand side of the page. Navigation in the Workbench is split between information for learners and information for instructors. The top right of the page has a toggle button between Learner and Instructor views, which change the four main navigation items in the top navigation bar.
Learner View
When this is toggled, the main navigation contains the following menu items: Key Points, Glossary, Learner Profiles, and More. The “More” dropdown menu contains information for learners from the learners/ folder aside from the setup instructions.
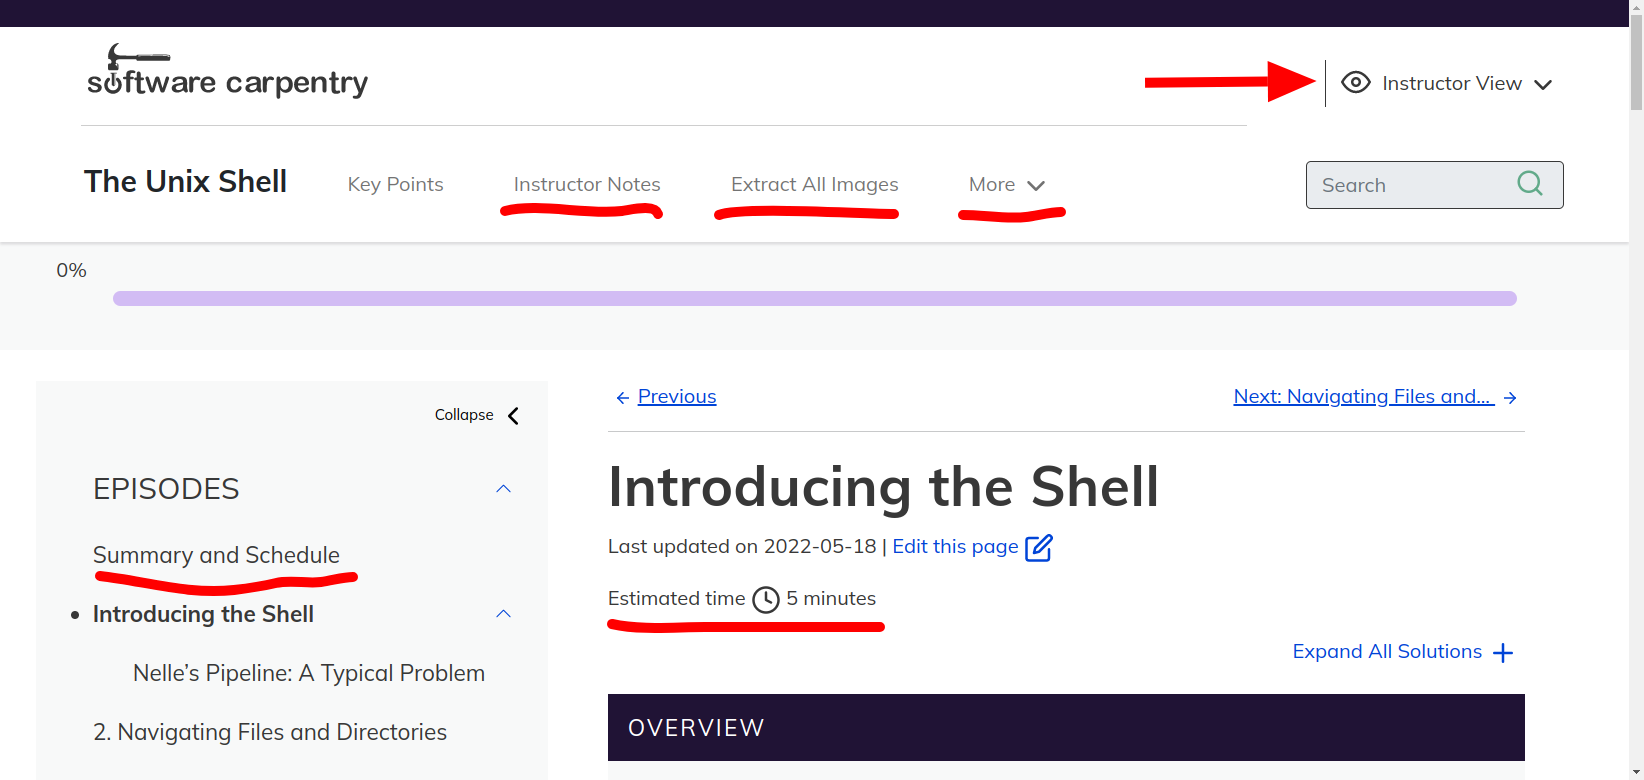
Instructor view
When this is toggled, the main navigation contains the following menu items: Key Points, Instructor Notes, Extract All Images, and More. The “More” dropdown menu contains information for learners from the instructors/ folder.
In addition, the schedule now appears on the home page, instructor notes are displayed inline, and the estimated timings for a lesson appear.
styles
Navigation in the styles repository is relegated to a single menubar at the top of the lesson with seven items: Home, Code of Conduct, Setup, Episodes (dropdown), Extras (dropdown), License, and Improve This Page.
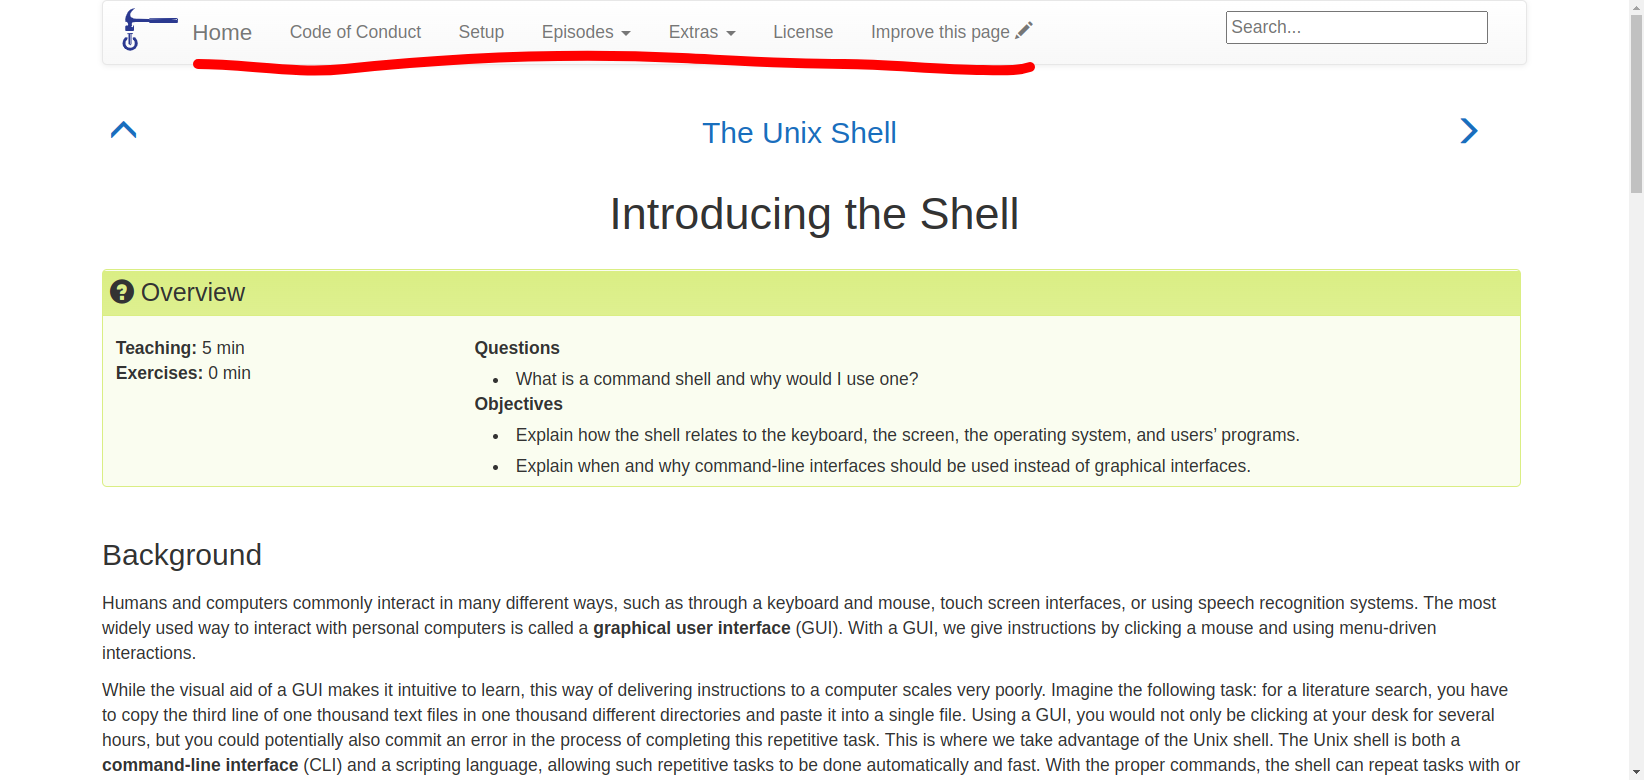
While the styles repositories appear to be simpler, there were several components of lessons (such as instructor notes and glossary terms) that were not clearly available to learners or instructors. Moreover, in cases like instructor training, where there was much extra content for both learners and instructors, it was not easy to look at the “Extra” menu and determine what content was appropriate for a learner or an instructor.
Setup Information
Workbench
The setup instructions are located on the home page at the #setup anchor.
The link to get to the setup is located at the “Summary and Setup” (in Learner View) or the “Summary and Schedule” links (in Instructor View) in the side navigation bar:

styles
The setup instructions are in a separate page called /setup
The link for the setup instructions are located in the navigation bar.

Improve/Edit This Page
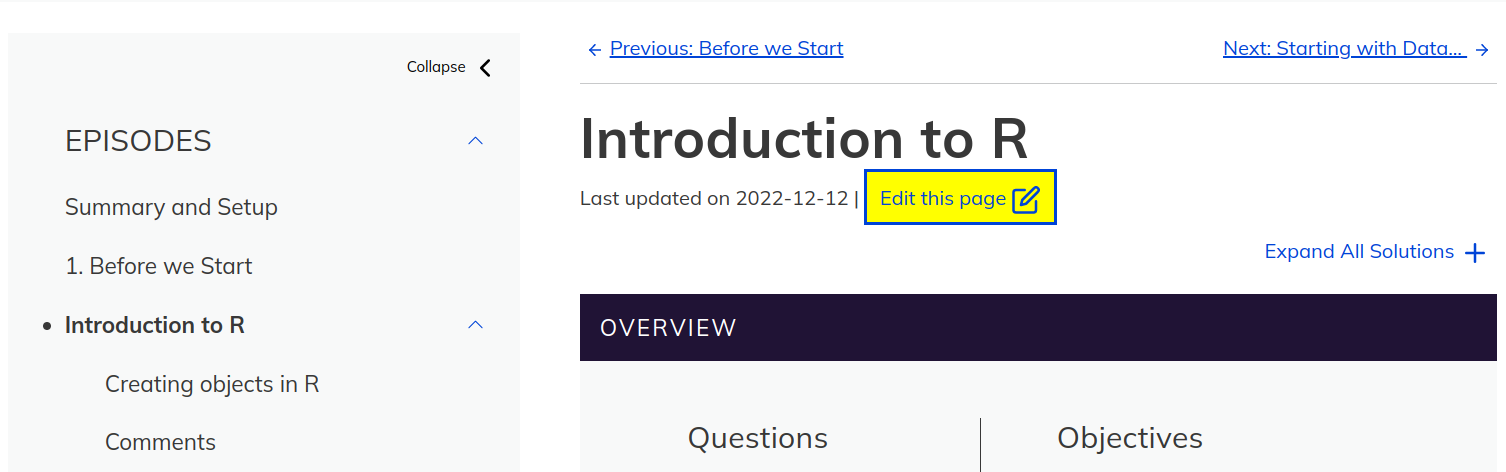
Our core values state that we value openness, all contributions, and are always learning. This is why we have an “edit this page” button on all of our lessons, so anyone can make suggestions. This button is always at the top and the bottom of episodes.
Workbench
The “Edit This Page” button is located under the heading for each episode:
and on the first column of the footer:

styles
The navigation bar in styles contains a link to “Improve this page”:

The footer contains a link to “Edit on GitHub”

License
Our official lessons are all CC-BY, but lessons that are not official may have alternative licenses. Moreover, code and data should also specify attribution and reuse.
Workbench
The License information can be found at the LICENSE.html page, whose link is always in the footer:

styles
The License information can be found at the LICENSE.html page, whose link is in the header:

Code of Conduct
The Carpentries Code of Conduct ensures that our workshops and lessons are a safe space to learn and create. This link is always on our lesson pages. It provides rules for behaviour and reporting guidelines.
Workbench
The Code of Conduct information can be found at the CODE_OF_CONDUCT.html page, whose link is always in the footer:

styles
The Code of Conduct information can be found at the CODE_OF_CONDUCT.html page, whose link is in the header

All in One Page
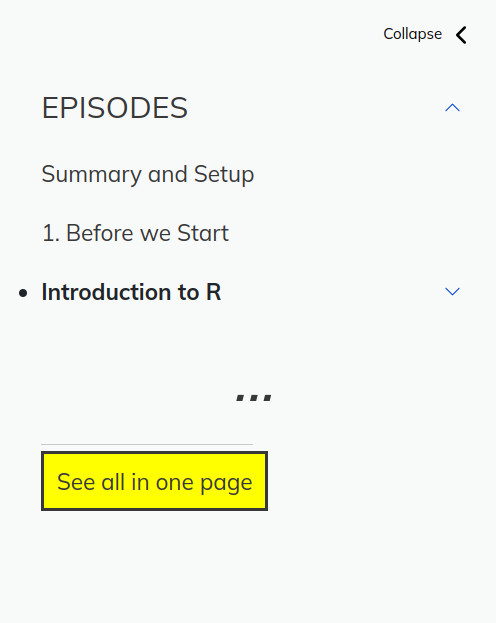
The all-in-one page concatenates all of the episodes in a lesson so that you can scroll through the episodes without having to switch pages.
Workbench
The link to this page is at aio.html and can be found at the bottom of the side navigation bar.
You can jump to individual episodes within this page by adding #aio-[page slug] to the end of the URL.
For example, From the Workbench Documentation, following https://carpentries.github.io/sandpaper-docs/aio.html#aio-episodes will bring you to the “Episode Structure” episode in the all in one page.
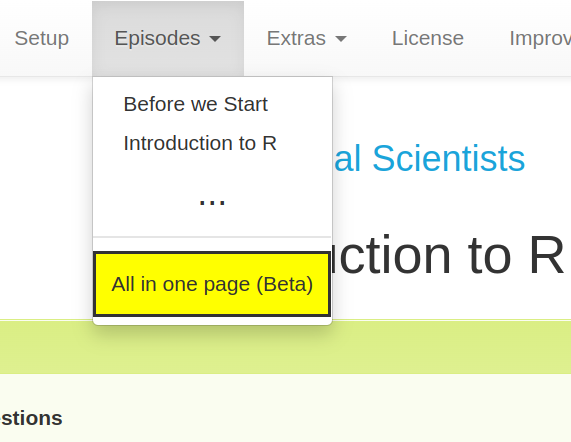
styles
The link to this page is at aio.html and can be found at the bottom of the episode dropdown in the navigation bar.
Note that there is no clear division between the episodes in this page.
one exception: github workflows are contained inside the
.github/workflowsfolder↩︎python in styles is required for validation and initialisation, but is not required for local rendering↩︎
R in styles is required for R Markdown-based lessons↩︎
caveat: we still need the GitHub actions, but those are buried in the
.githubfolder↩︎Captions allow visually impaired users to choose if they want to skip over the table contents if it is scannable. MDN docs: adding a caption to your table↩︎